- /**
- * GD image text outer
- *
- * @copyright UGiA.CN
- * www.ugia.cn/?p=88
- * @edit bbs.it-home.org
- */
- function imagetextouter(&$im, $size, $x, $y, $color, $fontfile, $text, $outer)
- {
- if (!function_exists('ImageColorAllocateHEX'))
- {
- function ImageColorAllocateHEX($im, $s)
- {
- if($s{0} == "#") $s = substr($s,1);
- $bg_dec = hexdec($s);
- return imagecolorallocate($im,
- ($bg_dec & 0xFF0000) >> 16,
- ($bg_dec & 0x00FF00) >> 8,
- ($bg_dec & 0x0000FF)
- );
- }
- }
- $ttf = false;
- if (is_file($fontfile))
- {
- $ttf = true;
- $area = imagettfbbox($size, $angle, $fontfile, $text);
- $width = $area[2] - $area[0] + 2;
- $height = $area[1] - $area[5] + 2;
- }
- else
- {
- $width = strlen($text) * 10;
- $height = 16;
- }
- $im_tmp = imagecreate($width, $height);
- $white = imagecolorallocate($im_tmp, 255, 255, 255);
- $black = imagecolorallocate($im_tmp, 0, 0, 0);
- $color = ImageColorAllocateHEX($im, $color);
- $outer = ImageColorAllocateHEX($im, $outer);
- if ($ttf)
- {
- imagettftext($im_tmp, $size, 0, 0, $height - 2, $black, $fontfile, $text);
- imagettftext($im, $size, 0, $x, $y, $color, $fontfile, $text);
- $y = $y - $height + 2;
- }
- else
- {
- imagestring($im_tmp, $size, 0, 0, $text, $black);
- imagestring($im, $size, $x, $y, $text, $color);
- }
- for ($i = 0; $i < $width; $i ++)
- {
- for ($j = 0; $j < $height; $j ++)
- {
- $c = ImageColorAt($im_tmp, $i, $j);
- if ($c !== $white)
- {
- ImageColorAt ($im_tmp, $i, $j - 1) != $white || imagesetpixel($im, $x + $i, $y + $j - 1, $outer);
- ImageColorAt ($im_tmp, $i, $j + 1) != $white || imagesetpixel($im, $x + $i, $y + $j + 1, $outer);
- ImageColorAt ($im_tmp, $i - 1, $j) != $white || imagesetpixel($im, $x + $i - 1, $y + $j, $outer);
- ImageColorAt ($im_tmp, $i + 1, $j) != $white || imagesetpixel($im, $x + $i + 1, $y + $j, $outer);
- // 取消注释,与Fireworks的发光效果相同
- /*
- ImageColorAt ($im_tmp, $i - 1, $j - 1) != $white || imagesetpixel($im, $x + $i - 1, $y + $j - 1, $outer);
- ImageColorAt ($im_tmp, $i + 1, $j - 1) != $white || imagesetpixel($im, $x + $i + 1, $y + $j - 1, $outer);
- ImageColorAt ($im_tmp, $i - 1, $j + 1) != $white || imagesetpixel($im, $x + $i - 1, $y + $j + 1, $outer);
- ImageColorAt ($im_tmp, $i + 1, $j + 1) != $white || imagesetpixel($im, $x + $i + 1, $y + $j + 1, $outer);
- */
- }
- }
- }
- imagedestroy($im_tmp);
- }
- ?>
复制代码
2,调用示例:
- header("Content-type: image/png");
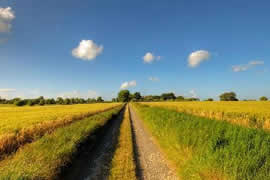
- $im = imagecreatefromjpeg("bluesky.jpg");
- $white = imagecolorallocate($im, 255,255,255);
- imagetextouter($im, 9, 10, 20, '#000000', "simsun.ttc", '新年快乐', '#ffffff');
- imagetextouter($im, 2, 10, 30, '#FFFF00', "", 'hello, world!' , '#103993');
- imagepng($im);
- imagedestroy($im);
- ?>
复制代码
再来说马赛克:void imagemask ( resource image, int x1, int y1, int x2, int y2, int deep) imagemask() 把坐标 x1,y1 到 x2,y2(图像左上角为 0, 0)的矩形区域加上马赛克。 deep为模糊程度,数字越大越模糊。
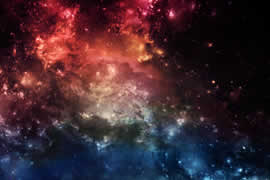
效果,如下图:
1,马赛克函数代码:
- /**
- * GD image mask
- *
- * @edit bbs.it-home.org
- */
- function imagemask(&$im, $x1, $y1, $x2, $y2, $deep)
- {
- for($x = $x1; $x < $x2; $x += $deep)
- {
- for ($y = $y1; $y < $y2; $y += $deep)
- {
- $color = ImageColorAt ($im, $x + round($deep / 2), $y + round($deep / 2));
- imagefilledrectangle ($im, $x, $y, $x + $deep, $y + $deep, $color);
复制代码
2,调用示例:
复制代码 |